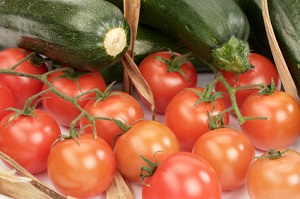
Zucchini, Tomato, & Basil


It is that time of year when fresh vegetables are coming off the vine.  I love zucchini prepared on the grill as the hot dry heat allows the zucchini to lose its moisture without ending up in a soupy bath.  Shredding the zucchini (without the seedy watery cores), tossing it in salt, draining and drying it also allows moisture in the vegetable to escape before you cook it in a pan so you do not end up with a mushy mess.  Add in tomato, garlic, and some fresh basil….yummm.  Give it a try.


5 medium zucchini (about 8 ounces each), ends trimmed
3 cored, seeded, and diced plum tomatoes
1 small clove minced garlic
1 teaspoon balsamic vinegar
1 3/4 teaspoon salt
2 tablespoons chopped fresh basil leaves
1/4 cup finely grated Parmesan
salt and pepper to taste
1 tablespoon plus 3 teaspoons extra-virgin olive oil, plus extra for serving, if desired


1. Cut each zucchini crosswise into several pieces, each 2 to 3 inches long. Shred each piece on large holes of box grater, rotating as needed to avoid shredding seeds and core (which should be discarded); you should have about 10 cups shredded zucchini. Toss zucchini with 1 1/2 teaspoons salt and place in colander set in medium bowl; let drain 5 to 10 minutes. Wrap zucchini in kitchen towel, in batches if necessary, and wring out excess moisture.


2 . Combine 3 cored, seeded, and diced plum tomatoes, 1 small clove minced garlic, 1 teaspoon balsamic vinegar, 2 teaspoons extra-virgin olive oil, 1/4 teaspoon salt and 2 tablespoons chopped fresh basil leaves in small bowl and set aside. Place zucchini in medium bowl and break up any large clumps


3. Heat remaining 2 teaspoons oil in a nonstick skillet over high heat until faint smoke appears. Add zucchini and spread evenly in pan with tongs; cook without stirring until bottom layer browns, about 2 minutes; stir well, breaking up any clumps with tongs, then cook until “new” bottom layer browns, about 2 minutes more. Take off heat and stir in tomato mixture and salt and pepper to taste. Sprinkle with 1/4 cup Parmesan. Serve immediately, drizzling with additional olive oil, if desired.

Share this:
Share this page via Email Share this page via Stumble Upon Share this page via Digg this Share this page via Facebook Share this page via Twitter
Posted in Recipes | Tagged , , , | Leave a comment

Braised Artichokes


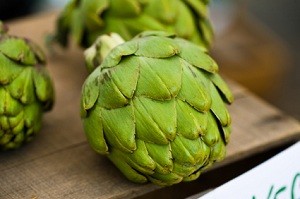
I have often wondered how someone originally figured out how to cook artichokes.  The artichokes in this recipe will absorb the flavors of the lemon, coriander and fennel seeds.  You know that I am all about anything that I can do ahead so I am not so rushed anytime I am having guests.  The artichokes in this recipe can be braised 1 day ahead and chilled in the cooking liquid, then reheated to a warm temperature and finished off.


1 lemon halved

8 medium artichokes

3 small shallots, sliced into small rings

1 carrot, finely chopped

3 garlic cloves thinly sliced

1/4 tsp fennel seeds
1/4 tsp coriander seeds
1/2 cup extra virgin olive oil
1 1/2 cups water

zest of half of a lemon

1/4 cup fresh lemon juice

2 tbsp chopped flat leaf parsley


  1. Trim the Artichokes into hearts.   Add lemon halves to a large bowl of cold water, squeezing to release juice.
  2. Cut off top inch of 1 artichoke and bend back outer leaves until they snap off close to base (keep stem attached). Discard several more layers in same manner until you reach pale yellow leaves.
  3. Cut remaining leaves flush with top of the artichoke
    bottom using a sharp knife. Trim dark green fibrous parts from base and sides of the artichoke.
  4. Peel sides of stem down to pale inner core. Put in the lemon water while preparing the remaining artichokes.
  5. Cook shallots, carrot, garlic, and seeds in 1/4 cup oil in a 5-qt heavy pot (pot should be wide enough to hold the artichokes in 1 layer with stems pointing upward) over medium heat, stirring occasionally, 3 minutes. Add water, zest, and 3 Tbsp lemon juice and bring to a simmer. Stand the artichokes in pot and season with 1 tsp salt and 1/4 tsp pepper. Cover the artichokes with wax paper, then a lid, and simmer over medium-low heat until bases are just tender when pierced with a knife, 20 to 30 minutes.
  6. Transfer the artichokes to a dish and reserve cooking liquid. When the artichokes are cool enough to handle, halve lengthwise. Scoop out and discard inner choke (fuzzy center and any sharp leaves).
  7. Heat 2 Tbsp oil in a 12-inch heavy skillet over medium-high heat until it shimmers, then brown cut sides of the artichokes in 2 batches, about 2 minutes per batch, transferring to a serving dish. Add the reserved cooking liquid to skillet along with the remaining Tbsp lemon juice and the remaining 2 Tbsp oil. Boil vigorously 3 minutes, then stir in parsley and pour over the artichokes. Serve warm or at room temperature.


Share this:
Share this page via Email Share this page via Stumble Upon Share this page via Digg this Share this page via Facebook Share this page via Twitter
Posted in Recipes | Tagged , , | Leave a comment

Storing Shallots, Onions, and Garlic

Looking for a good way to store onions, shallots, and garlic in a dark, cool place with plenty of air circulation?  Try storing them in your bamboo steamer.  The baskets stack easily and allow just enough air circulation to prevent mold.

Share this:
Share this page via Email Share this page via Stumble Upon Share this page via Digg this Share this page via Facebook Share this page via Twitter
Posted in Kitchen Tips | Tagged , , , , | Leave a comment

Blue Cheese Potatoes Gratin


I love gratin potatoes. Potatoes and Blue Cheese are a wonderful flavor blend for me.  So it is no leap to see why this is a favorite recipe for me.  Try adding a little zing to your side dishes tonight and put one of these in the oven.


1 1/2 lb medium yellow potatoes such as Yukon Gold

1 cup heavy cream

1 clove garlic, finely chopped

1/2 teaspoon salt

1/4 teaspoon freshly ground black pepper

1/2 cup crumbled blue cheese


  1. Put oven rack in upper third of oven and preheat oven to 425°F.
  2. Peel potatoes and slice 1/8 inch thick with slicer, then toss with cream, garlic, salt, and pepper and place in a 10 inch oven proof skillet or dish. Cover with foil and roast until potatoes are very tender, about 25 minutes.
  3. Remove from oven and preheat broiler. Remove foil and sprinkle potatoes with cheese. Broil until top is browned,  2 to 3 minutes.


Share this:
Share this page via Email Share this page via Stumble Upon Share this page via Digg this Share this page via Facebook Share this page via Twitter
Posted in Recipes | Tagged , , , | Leave a comment

Cherries Jubilee and Bananas Foster


As a retro dessert of the week, what could be better than a flaming dessert? I remember when fashionable restaurants would do flaming desserts at your table while all of the other guests watched. The presentation and pageantry of it was beautiful. A few weeks ago I was in Las Vegas and went to the Golden Steer restaurant. It is one of my favorites as they make no attempt to be anything other than what they always were. This is not one of the new fashionable eateries, it is a flash back in time to its founding in 1958, and yes they still do tableside flaming Cherries Jubilee or Bananas Foster.


As we were ordering our desserts, the manager who was floating around talking to all of the guests, stopped by to tell us the origin of each recipe. Cherries Jubilee is credited to Auguste Escoffier, who prepared the dish for one of Queen Victoria’s Jubilee celebrations, though it is unclear whether it was for the Golden Jubilee of 1887 or the Diamond Jubilee in 1897.  Bananas Foster was created in 1951 by Paul Blangé at Brennan’s Restaurant in New Orleans. It was named for Richard Foster, a friend of Owen Brennan’s who was then New Orleans Crime Commission chairman.


These recipes are fast, easy, and everyone loves them. While both of these recipes are excellent over ice cream, I also use them as a topping for French toast if I need a sweet item to add to a brunch menu. So come on, try them again, you will be happy that you did. Be careful and watch out for your flames to make sure that no one gets hurt!


Cherries Jubilee

1/2 cup white sugar
2 tablespoons cornstarch
1/4 cup water
1/4 cup orange juice
1 pound Bing or other dark, sweet cherries, rinsed and pitted (or use frozen pitted cherries)
1/2 teaspoon finely grated orange zest
1/4 teaspoon cherry extract
1/4 cup brandy
3 cups vanilla ice cream


1. Whisk together the sugar and cornstarch in a wide saucepan. Stir in the water and orange juice. Bring to a boil over medium-high heat, whisking until thickened. Stir in the cherries and orange zest, return to a boil, then reduce heat, and simmer for 10 minutes. While the cherries are cooking, spoon the ice cream into serving bowls.


2. Remove the cherries from the heat, and stir in the cherry extract. Pour in the brandy, and ignite with a long lighter. Gently shake the pan until the blue flame has extinguished itself. Spoon the cherries over the bowls of ice cream.


Bananas Foster

¼ cup (½ stick) butter
1 cup brown sugar
½ teaspoon cinnamon
¼ cup banana liqueur
4 bananas, cut in half
lengthwise, then halved
¼ cup dark rum
4 scoops vanilla ice cream


1. Combine the butter, sugar, and cinnamon in a flambé pan or skillet. Place the pan over low heat either on an alcohol burner or on top of the stove, and cook, stirring, until the sugar dissolves. Stir in the banana liqueur, then place the bananas in the pan. When the banana sections soften and begin to brown, carefully add the rum. Continue to cook the sauce until the rum is hot, then tip the pan slightly to ignite the rum. When the flames subside, lift the bananas out of the pan and place four pieces over each portion of ice cream. Generously spoon warm sauce over the top of the ice cream and serve immediately.

Share this:
Share this page via Email Share this page via Stumble Upon Share this page via Digg this Share this page via Facebook Share this page via Twitter
Posted in Recipes | Tagged , , , , | Leave a comment

Removing Fat

If you find yourself without a separator you can remove fat easily from drippings by pouring everything into a large glass measuring cup, put in 4 or 5 ice cubes (enough to cover the surface of the cup) and after a few minutes give the cubes a gentle stir.  They will be covered with the congealed fat that you can then use a slotted spoon to remove.

Share this:
Share this page via Email Share this page via Stumble Upon Share this page via Digg this Share this page via Facebook Share this page via Twitter
Posted in Kitchen Tips | Tagged , , , | Leave a comment

Vegetable Soup

Vegetable Soup

Vegetable Soup

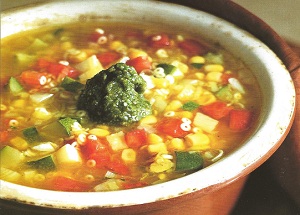
I was talking with a friend of mine in New York this morning and she said it was cold and rainy there. It is also cool and rainy today in Southern California, which is odd for us at this time of the year. Cold rainy days get me in the mood to make soup. This is a very easy vegetable soup recipe, but it still has a lot of really good flavor. While the soup has a great flavor on its own (and sometimes I like it just that way) it can be elevated to a whole new set of flavors by adding a dollop of pesto to it right before serving. The flavors of the sun dried tomatoes and vegetables of the soup with the basil and parmesan of the pesto is a real treat.

If you are a person who likes to do it in advance, then can or freeze, this soup is an excellent choice. Not only does the soup freeze well, but so does the pesto. When I have a lot of basil coming in that I need to use, it is a great choice to use it to freeze a big batch of pesto reduced into small portions for easy retrieval and use later.

Soup

Salt and freshly ground pepper

1/2 cup anellini, tubetti, or orzo pasta

6 tbsp extra-virgin olive oil

3 leeks, white part only, thinly sliced

1 fennel bulb, trimmed and cut into small dice, plus handful of feathery tops, chopped

1 bay leaf

Leaves from 2 or 3 large fresh thyme sprigs, chopped

2 cloves garlic, crushed

Kernels cut from 2 ears of corn

2 small zucchini trimmed and cut into small dice

3 large tomatoes, peeled and seeded then cut into small dice

5 oil packed sun dried tomatoes, drained and cut into small dice

6 cups vegetable stock

Pesto

1/4 cup pine nuts

1/4 cup walnuts

1 clove garlic

2 cups loosely packed fresh basil leaves

1/2 cup extra virgin olive oil

1/2 cup of grated parmesan cheese

salt

Soup

Bring a saucepan of water to a boil. Generously salt the boiling water, add the pasta, and cook until barely tender, 6-8 minutes. The pasta will continue to cook in the soup so do not overcook the pasta. Drain and toss with 2 tablespoons of the olive oil.

In a large soup pot over medium heat add 4 tablespoons olive oil. Add the leeks, fennel bulb and tops, bay leaf, and thyme. Season with salt and pepper to taste and saute until all the vegetables are fragrant and just starting to soften, about 5 minutes. Add the garlic and saute for 1 minute. Add the corn and the zucchini, season with a bit more salt, and saute for 2-3 minutes. Add the fresh and sun-dried tomatoes and the stock. Raise the heat to high and bring to a boil. Reduce the heat to medium and cook, uncovered, at a lively simmer until all the vegetables are tender, 15-20 minutes. Skim the surface if necessary to remove any foam. Add the cooked pasta. Taste and adjust the seasoning. Cook briefly just to reheat the pasta.

Pesto

In a blender or food processor combine the nuts and garlic and chop coarsely. Add the basil and olive oil and process to a coarse paste. Add the cheese and process just to incorporate it. Do not over process as the pesto should be smooth, but still have some texture. Add salt to taste.

Share this:
Share this page via Email Share this page via Stumble Upon Share this page via Digg this Share this page via Facebook Share this page via Twitter
Posted in Recipes | Tagged , , , , , , | Leave a comment

Squash Casserole

Squash Casserole

Squash Casserole

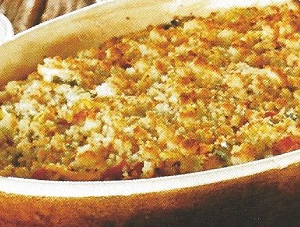
When I was at the farm this weekend, they had some squash that looked really good so I bought some for a casserole which I have ready now for the oven.. I originally saw this recipe in a Gourmet book and it became on of my favorites.


This casserole has an amazing flavor and is a great option for dinner parties where you need some really good vegetarian options. The casserole (without bread crumbs) can be assembled 1 day ahead and cooled completely, uncovered, then chilled, covered tightly with plastic wrap. let stand at room temperature 1 hour before sprinkling with bread crumbs and baking.


4 lbs of yellow squash, trimmed and halved lengthwise and sliced crosswise 1/8 inch

1/4 cup vegetable oil

2 teaspoons salt

2 teaspoons black pepper

2 medium onions, chopped (2 cups)

1 green bell pepper, chopped

1 red bell pepper, chopped

7 tablespoons unsalted butter

4 slices firm white sandwich bread with crust, coarsely ground in a food processor (about 2 1/4 cups)

1/4 cup all-purpose flour

1  3/4 cups reduced-sodium chicken broth (14 fl oz)

1 cup sour cream


  1. Put oven rack in lower third of oven and put a large shallow baking pan on rack, then preheat oven to 475°F.
  2. Toss one third of squash with 1 tablespoon oil, 1/2 teaspoon salt, and 1/2 teaspoon pepper in a bowl, then spread in preheated baking pan in 1 layer and roast in oven, stirring once, until tender, 12 to 15 minutes. Transfer squash to a large bowl.  Roast remaining squash in 2 batches in same manner, tossing with 1 tablespoon oil, 1/2 teaspoon salt, and 1/2  teaspoon pepper (per batch) just before roasting and adding to bowl when done.
  3. Toss onions and bell peppers with remaining tablespoon oil, remaining 1/2 teaspoon salt, and remaining 1/2 teaspoon pepper in another large bowl, then spread in baking pan and roast, stirring once, until onions are golden, 8 to 10 minutes. Transfer to bowl with squash.
  4. Move oven rack to middle position and reduce oven temperature to 400°F.
  5. Melt 3 tablespoons butter in a saucepan and remove from heat, then add bread crumbs and a pinch of salt, tossing to coat crumbs.  Spread evenly in cleaned baking pan and bake, without stirring, until pale golden, about 5 minutes.
  6. Melt remaining 4 tablespoons butter in a 3-quart heavy saucepan over moderately low heat, then whisk in flour and cook roux, whisking constantly, 3 minutes. Add broth, whisking, and bring to a boil, whisking. Reduce heat and simmer, whisking occasionally, 3 minutes. Remove from heat and cool 5 minutes, whisking occasionally, then whisk in sour cream and salt and pepper to taste. Pour sauce over squash mixture and stir gently until combined well.
  7. Butter a 13- by 9- by 2-inch glass or ceramic baking dish (3-quart capacity), then spread squash mixture evenly into it and sprinkle with bread crumbs. Bake casserole until golden and bubbling, 15 to 20 minutes. Serve immediately.


Share this:
Share this page via Email Share this page via Stumble Upon Share this page via Digg this Share this page via Facebook Share this page via Twitter
Posted in Recipes | Tagged , , , , | Leave a comment

Strawberry Jam

Strawberry Jam

Strawberry Jam


Blackberry Jam….oh no wait…..Strawberry.  So every year at this time I am used to blackberries being ready for picking.  It has been such a regular occurrence the last few years that I did not call to see if they were ready.  So imagine my surprise when Saturday morning I showed up early to pick, only  to find that they are late this year and still another 2-3 weeks away (from being able to pick big batches).  So, here is a tip, learn from my mistake and call your local farm first!  It was not a loss however, as the strawberries were beautiful and I needed to make a batch.


Many people think that there is some big secret, or that it is a big chore to can your own foods. As I was growing up, you spent the summers processing the foods that came in so that you had plenty for the winter season.  Fruits are usually high in acids so they only need a water bath canner which is very simple to do.


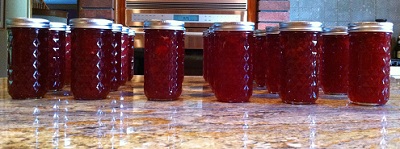
This weekend I canned 36 of the 12 oz give away  jars.  I find that a selection of homemade jams make nice gifts and I supply a lot of people with their jam for the year.  I also processed 6 sugar free jars made with Splenda for the people that I know that can’t have sugar,  and 12 pints of regular jars.


Over the years I have experimented with “designer jams”  combining flavors like strawberry lemon, strawberry pepper, strawberry vanilla, and strawberry balsamic.  You should definitely experiment to find your favorite flavor blend. I have found that each if these are wonderful in their own way and have developed a long line of fans (strawberry lemon being the most popular..think a strawberry lemonade flavor).  While each of these are a great blend, and the additional flavor brings out a different aspect of the strawberry, there is nothing like a simple classic.  Make sure you measure correctly as the ratios are very important to getting your jam to set correctly.


For you avid canners out there, sorry for the canning 101 recipe. For those who have never canned, give it a try, it is really very simple. If you need a canning cookbook, check out the selection of them in our store.


7  cups granulated sugar

5 cups crushed strawberries, approximately 8 cups

4 tbsp lemon juice

1/8 to 1/4 tsp lemon zest (optional) I like a little lemon in the background

1 package 1.75oz regular powdered pectin

1/2 tsp butter (optional, but it cuts down on the foam that you will need to remove later)


    1. Place 8 clean 8-ounce ( if you like larger portions you can use 12oz or 16 oz too just use less jars canning  jars) on a rack in a boiling-water canner. (You can also use a large, deep saucepan or stockpot that is at least 3inches deeper than the height of the jars.) Fill the jars and canner with cool water that reaches the top of the jars. Cover and bring water to a simmer over medium heat. Do not boil.


    2. Prepare the same number of closures as number of jars you are processing. Set screw bands aside. Place lids in a small saucepan and cover with water. Heat
    just to a simmer over medium heat, but do not boil. Keep lids warm until ready to use. Do not heat screw bands.


    3. Measure sugar into a bowl and set aside. (Sugar is added to the boiling jam all at once, so measuring it ahead of time prevents errors in quantities and eliminates cooking delays.)


    4. In a colander placed over a sink, wash strawberries in cool running water. Drainthoroughly and, using a strawberry huller or the rounded end of a potato peeler, remove hulls. Cut the strawberries into quarters.


    5. In a bowl, place a single layer of strawberries. Using a potato masher, crush the berries and transfer to a 1-cup (250 ml) liquid measure. I like my jam with larger berries in it, so I do not crush them as fine. If you like berry pieces in your jam, remember that the berries will cook down in the process, so do not be afraid to leave some larger pieces.  As you accumulate each cup  transfer the crushed berries to a large, deep stainless steel pot.  Make sure your pot is deep enough as the mixture will double in size as it boils with the sugar and  you do not want it to overflow.  I use a stockpot.   Repeat until you have 5 cups (1.25 L) of crushed strawberries.


    6. Add lemon juice and butter to the crushed strawberries in saucepan. Whisk in the pectin until dissolved. Bring to a full rolling boil over high heat, stirring frequently. Add sugar all at once and, stirring constantly, return to a full rolling boil that cannot be stirred down. The mixture will now be twice the size, stir slowly and be careful to be well above the liquid so that none of it splatters on you as it will be extremely hot.  Boil hard, stirring constantly, for 1  minute. Remove from heat and, using a large slotted metal spoon, skim off any foam.


    7. Fill one jar at a time. Remove jar from canner and empty hot water back into canner. (Do not dry jar.) Place jar on a tray or towel covered counter and place a canning funnel in it. Ladle hot jam into hot jar, leaving 1/4 inch (0.5 cm) headspace. Slide a nonmetallic utensil, such as a rubber spatula, down between the jam and the inside of jar two or three times to release air bubbles. Adjust headspace, if necessary, by adding hot jam. With a clean damp cloth or paper towel, wipe jar rim and threads to remove any food residue. Using a magnetic or nonmetallic utensil, lift hot lid from water and center it on jar. Place screw band on jar and, with your fingers, screw band down evenly and firmly, just until resistance is met, then increase to fingertip-tight. Do not over-tighten or use any tools to apply screw band. Return jar to canner rack and repeat until all jam is used .


    8. When all jars are filled, lower rack into canner and ensure jars are completely covered by at least 1 inch (2.5 cm) of hot water. Cover canner and bring water to a full rolling boil over high heat. Process (continue boiling rapidly) for 10 minutes, starting timer only when water reaches a full rolling boil. At the end of the processing time, turn heat off and remove canner lid. Wait 5 minutes, then remove jars, without tilting. Place jars upright on a towel in a draft-free place and let cool, undisturbed, for 24 hours.
    9.  After 24 hours, check lids for seal. Remove screw bands and press down on the center of each lid with your finger. Sealed lids will be concave (they’ll curve downward) and will show no movement when pressed. Jars that haven’t sealed properly must be refrigerated immediately. Rinse and dry screw bands. Wipe jars and, if desired, loosely reapply screw bands. Label jars and store in a cool, dry, dark place.


Share this:
Share this page via Email Share this page via Stumble Upon Share this page via Digg this Share this page via Facebook Share this page via Twitter
Posted in Recipes | Tagged , , , | Leave a comment

Perfect Chocolate Cake

Perfect Chocolate Cake

Perfect Chocolate Cake

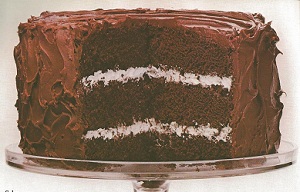
A perfect chocolate cake? Many make the claim, but for me this one delivers.


This recipe was originally published in a McCall’s cookbook, I later found out from 1963-73. A couple of years ago at Thanksgiving, Wilma wanted to make the chocolate “ordeal” cake. This is a simple recipe, but they had renamed it the ordeal cake as one time when making it David had mixed up the baking soda and salt and they had to remake it again. My first time doing it on my own I also messed it up and forgot to include ingredients and had to do it over again. So be careful, follow the instructions closely, and it is pretty easy.


This is a great cake, but if you are also a fan of ports this is the PERFECT companion. The combination of the chocolate in this cake and the port is divine.


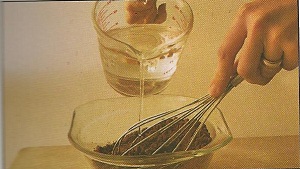
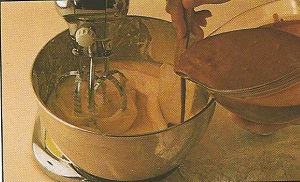
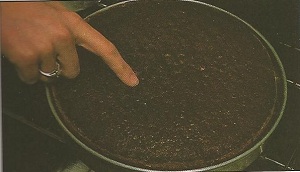
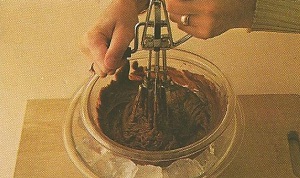
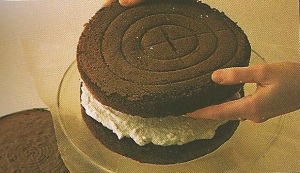
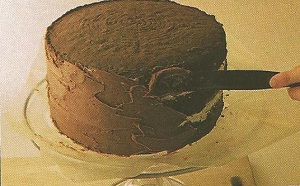
We were at our friend’s, Chuck and Robbie, house for dinner one evening and we began talking about a port and this cake. Robbie had gotten a McCall’s cookbook as a wedding present and it had been her bible of cooking over the years. We opened it up and there the recipe was on page 27. She later found me a copy on ebay and gave it to me. Thanks Chuck & Robbie!! If you see one, it is called “The New McCall’s Cook Book” by Mary Eckley. It has a lot of great recipes! I have included the step by step pictures from the book for your enjoyment.


Give this one a try, it is DELICIOUS!


Cake:

1 cup unsifted unsweetened cocoa
2 cups boiling water
2 and 3/4 cups sifted all-purpose flour
2 teaspoons baking soda
1/2 teaspoon salt
1/2 teaspoon baking powder
1 cup butter or regular margarine softened
2 and 1/2 cups granulated sugar
4 eggs
1 and 1/2 teaspoons vanilla extract


Frosting:

1 pkg ( 6 oz semisweet chocolate pieces
1/2 cup light cream
1 cup butter
2 and 1/2 cups unsifted confectioners’ sugar


Filling:

1 cup heavy cream chilled
1/4 cup unsifted confectioners’ sugar
1 teaspoon vanilla extract


1. In medium bowl combine cocoa with boiling water, mixing with wire whisk until smooth. Cool completely. Sift flour with soda, salt, and baking powder. Preheat oven to 350 degrees. Grease well and lightly flour three 9 X 1 and 1/2 inch layer cake pans.

2. In large bowl of electric mixer, at high speed, beat softened butter, sugar, eggs and vanilla, scraping bowl occasionally, until light ( about 5 minutes). At low speed, beat in flour mixture ( in fourths) alternately with cocoa mixture ( in thirds), beginning and ending with flour mixture. Do not overbeat..Divide equally into pans, smooth tops. Bake 25 to 30 minutes, or until surface springs back when gently pressed with fingertip. Cool in pans for 10 minutes. Carefully loosen sides with spatula and remove from pans. Cool on racks.

3. For frosting, In medium saucepan combine chocolate pieces, cream and butter, stir over medium heat until smooth. Remove from heat, with whisk blend in 2 and 1/2 cups of confectioners’ sugar. In bowl set over ice, beat until it holds shape.

4. For filling: Whip cream with sugar and vanilla: refrigerate.

5. To assemble cake: On plate, place a layer top side down, spread with half of the cream (filling). Place a second layer top side down on the first and spread with rest of the cream. Place third layer, top side up.

6. To frost: With spatula, frost sides first, covering whipped cream and then use rest of the frosting on top, swirling decoratively. Refrigerate at least one hour before serving. To cut, use a thin-edged sharp knife and slice with a sawing motion. Serves 10 to 12.

Share this:
Share this page via Email Share this page via Stumble Upon Share this page via Digg this Share this page via Facebook Share this page via Twitter
Posted in Recipes | Tagged , , , , | Leave a comment