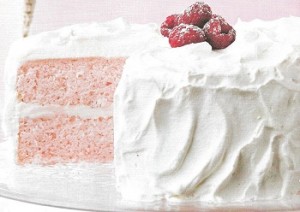
Champagne Cake


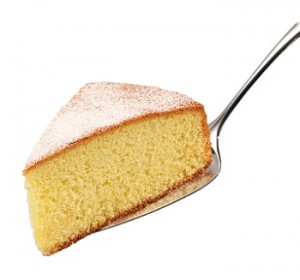
Here is a blast from the past, the Champagne Cake. This cake was extremely popular in the 50s, but  you rarely see it anymore.  This pretty pink cake is kept chilled until served.  Refreshing and delicious, not only can you have your champagne, you can eat it too.


Cake

2 1/2 cups sifted cake flour

1 Tbsp baking powder

1/2 tsp table salt

1 1/2 sticks unsalted butter, softened

2 cups granulated sugar

3/4 cup brut sparkling wine

1/4 cup milk

1 tsp. vanilla extract

6 drops red food coloring

6 egg whites


Frosting

1/2 cup shortening

1/3 cup brut sparkling wine

5 cups sifted powdered sugar

1/2 tsp unflavored gelatin

1 Tbsp cold water

3/4 cup heavy cream


Preheat oven to 350°. Line two 9-inch round cake pans with parchment paper and coat with nonstick spray.


Sift together flour, baking powder, and salt.  Cream butter and granulated sugar in a stand mixer until mixture is light and fluffy, about 3 minutes. Combine 3/4 cup sparkling wine, milk, and vanilla.


Add flour and wine mixtures alternately to butter mixture, combining well after each addition. Tint batter with red
food coloring.


Beat egg whites in a separate bowl with clean beaters until soft peaks form, about 2 minutes.  Fold egg whites into cake batter in thirds, stopping as soon as whites are incorporated.


Divide batter evenly between prepared pans. Bake cakes until a toothpick inserted in the center has only one or two crumbs on it, about 30 minutes. Cool cakes in pans for 10 minutes, then turn cakes out onto a rack to cool completely.


Beat together shortening, 1/3 cup sparkling wine, and powdered sugar for frosting in a bowl until smooth.


Spread 1 cup frosting  on top of one cooled cake round. Place second cake round on top of the frosted round.


Sprinkle gelatin into water in a small saucepan. Let. mixture sit for 5 minutes, then gently warm over low heat until gelatin dissolves. Cool to room temperature.


Beat heavy cream until soft peaks form, about 3 minutes. Add gelatin mixture to cream; continue to beat until stiff peaks form. Working in batches, gently fold whipped cream into remaining frosting.


Spread frosting onto top and sides of cake, being careful not to overwork. Refrigerate cake 1 hour with a large bowl over the top to protect frosting. Use a spatula to gently swirl frosting before serving.

 

Share this:
Share this page via Email Share this page via Stumble Upon Share this page via Digg this Share this page via Facebook Share this page via Twitter
Posted in Recipes | Tagged , | Leave a comment

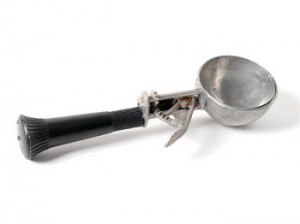
Ice Cream Scoops as Measuring Cups


Find it difficult to measure items like peanut butter or shortening?  Spring loaded ice cream scoops are great for this task as they come in 1/4,  1/3,  and 1/2 cup sizes.

Share this:
Share this page via Email Share this page via Stumble Upon Share this page via Digg this Share this page via Facebook Share this page via Twitter
Posted in Kitchen Tips | Tagged , , | Leave a comment

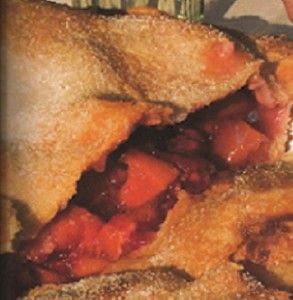
Raspberry Nectarine Pie

I have been at the farm this morning. The ingredients readily available usually inspire a revelation of something that I have not done in awhile. As I was growing up in the summer fruits were in abundance coming out of the orchards. Pie always says summer to me. The availability of raspberries and nectarines made me think of this delicious pie. A perfect blend of the sweet and tart, it is a real treat.


Whenever I have served this pie, people always remark that they would have never thought to put these two ingredients together in a pie. My friend Sue sent me this recipe a few years ago. I think she said she found it in Gourmet, which is one of our favorites and we love their work, but if it was not Gourmet we are going to give them credit for it anyway. You can always find great cookbooks from Gourmet in books section of our online store.


The dough for this can be made in advance and kept in the refrigerator covered for a day.


Crust

2 1/2 cups all-purpose flour
1 1/2 sticks (3/4 cup) cold unsalted butter, cut into 1/2 inch cubes
1/4 cup cold vegetable shortening
1/2 teaspoon salt
About 1/2 cup ice water
1/2 tablespoon milk
1 tablespoon sugar

Filling

3 lb nectarines
1 1/2 cups raspberries
1 1/2 tbsp lemon juice
1/8 cup quick cooking tapioca
1/8 cup of cornstarch
1/8 tsp salt
3/4 cup sugar

Crust

Blend together flour, butter, shortening, and 1/2 tsp salt in a bowl and with a pastry blender, or pulse in a food processor, until mixture resembles coarse meal with some roughly pea-size butter lumps. Drizzle evenly with 5 tablespoons ice water and gently stir with a fork (or pulse) until incorporated. Squeeze a small handful and If it doesn’t hold together, add more ice water to dough, 1 tablespoon at a time, stirring until just combined. Do not overwork, or pastry will be tough.


Turn out dough onto a work surface and divide into 6 portions. With heel of your hand, smear each portion once or twice in a forward motion to help distribute fat. Gather all of dough together with scraper and press into 2 balls, then flatten each into a 5-inch disk. Chill dough, each disk wrapped tightly in plastic wrap, until firm, at least 1 hour.


Filling

Cut nectarines into 1/2 inch-wide wedges, then toss with raspberries and lemon juice in a large bowl. Grind tapioca to a powder in grinder, then whisk together with cornstarch, salt, and sugar in a small bowl. Do not toss with fruit until dough is rolled out.


Put oven rack in lower third of oven and put a large sheet of foiI on rack. Preheat oven to 425°F.


Roll out disk of dough, 1 at a time (keep remaining disks chilled), on a lightly floured surface with a lightly floured rolling pin, into rounds, then fit into pie plate (do not trim) and chill until ready to use.


Gently toss sugar mixture with fruit and place in the pie shell. Cover pie with pastry round and trim edges leaving a 1/2 inch overhang. Press the edges together and crimp. Brush pastry top with milk and sprinkle a over with sugar (1 tablespoons total). Cut several steam vents in the top of pie with a small sharp knife.


Bake pies on the foil for 20 minutes. Reduce oven temperature to 375°F and continue to bake, checking frequently and covering the edges of the pie with a strip of foiI or pie shield if the crust is browning too fast. Bake until the crusts is golden brown and filling is bubbling, about 40 minutes more.


Cool pie to room temperature on a rack at least 2 hours.

Share this:
Share this page via Email Share this page via Stumble Upon Share this page via Digg this Share this page via Facebook Share this page via Twitter
Posted in Recipes | Tagged , , , | Leave a comment

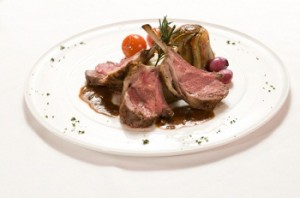
Rack of Lamb


When entertaining it is wonderful to serve a dish that does not trap you in the kitchen away from your guests.  Rack of lamb is easy to do and it makes a very elegant dish for your guests to enjoy. This is a simple, yet flavorful, foolproof recipe.  The biggest problem you will have is your guests wanting more.


1 rack of lamb, trimmed (about 1 1/2 pounds)

3/4 teaspoon salt

1/2 teaspoon freshly ground black pepper

1 tablespoon vegetable oil

2 tablespoons Dijon mustard

2 teaspoons minced garlic

1/4 cup seasoned bread crumbs

1 tablespoon grated Parmesan


Preheat the oven to 450 degrees F.

 
Season rack of lamb well on all sides with salt and pepper. Heat a medium skillet over high heat and, when hot, add the oil. When the oil is almost smoking, add the rack of lamb and brown well on all sides, about 6 minutes. Transfer the lamb to a plate and set aside to cool slightly before proceeding.


Spread the mustard evenly over all sides of the lamb, then spread the minced garlic over the lamb in the same manner.


In a bowl combine the breadcrumbs and grated cheese and toss to thoroughly combine. Using your hands or a spoon, spread the breadcrumb mixture evenly all over the lamb, pressing so that the crumbs adhere.


Place the rack of lamb on a baking sheet and bake for 12 to 15 minutes for medium-rare. Allow lamb to sit for 5 to 10 minutes before carving into chops  to serve.


Share this:
Share this page via Email Share this page via Stumble Upon Share this page via Digg this Share this page via Facebook Share this page via Twitter
Posted in Recipes | Tagged , | Leave a comment

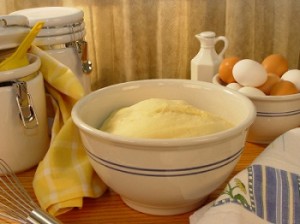
Rising Dough


Sometimes it can be hard to find a place warm enough for your dough to rise. Try placing a coffee mug with water in the microwave on high for a minute. Move the warmed coffee cup to the back corner, place the dough inside, and close the door. The heat from the coffee mug will keep the inside of your microwave between 80-90 degrees for up to 90 minutes, which is a perfect temperature to let your dough rise.

Share this:
Share this page via Email Share this page via Stumble Upon Share this page via Digg this Share this page via Facebook Share this page via Twitter
Posted in Kitchen Tips | Tagged , , | Leave a comment

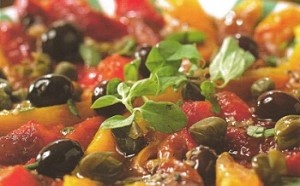
Roasted Peppers with Olives Capers and Marjoram


Bright and colorful, sweet and savory. an excellent combination for any dish. We love the flavor of roasted peppers and the marriage of the peppers, marjoram, olives, and capers are an excellent choice to showcase them. This colorful plate with its sunburst of colorful peppers and sprigs of marjoram is also a beautiful centerpiece for your table. Steaming your peppers in a plastic bag will help you to remove the skins. Make sure to give them enough steaming time to peel off easily.


3 red bell peppers
3 yellow bell peppers
5 tbsp extra virgin olive oil
2 tbsp dry sherry vinegar or lemon juice
2 garlic cloves, crushed
pinch of sugar

salt and pepper
1 tbsp capers
8 small black olives

 
2 tbsp chopped fresh marjoram, plus extra sprigs to garnish
Preheat the broiler. Place the bell peppers on a wire rack or broiler pan and cook under a hot broiler for 10 minutes, or until the skins have blackened and blistered, turning them frequently. Remove. the roasted bell peppers from the heat, then put them in a resealable plastic bag. Let the bell peppers stand for about 15 minutes, or until cool enough to handle. The steam will soften the skins and make them easy to remove.


Take the peppers one at a time and make a small hole in the base and squeeze out the juices into a large bowl. Peel off the blackened skin with your fingers or a knife and discard it. Cut the bell peppers in half and remove the stem, core, and seeds, then cut each bell pepper into thin strips. Arrange the bell pepper strips in a sun pattern on a serving plate.


Add the olive oil, sherry vinegar, garlic, sugar, and salt and pepper to taste to the pepper juices. Whisk together until combined. Drizzle the dressing evenly over the salad. Scatter the capers, olives, and chopped marjoram over the salad. Garnish with marjoram sprigs and serve at room temperature.

Share this:
Share this page via Email Share this page via Stumble Upon Share this page via Digg this Share this page via Facebook Share this page via Twitter
Posted in Recipes | Tagged , , , , | Leave a comment

Keep your cake moist

Ever fear that your cake will dry out after the first slices are taken out?  You can keep your cake moist by placing a peeled apple in with the cake under a cake  dome.  The moisture from the apple will keep the air under the dome humid.


Share this:
Share this page via Email Share this page via Stumble Upon Share this page via Digg this Share this page via Facebook Share this page via Twitter
Posted in Kitchen Tips | Tagged , | Leave a comment

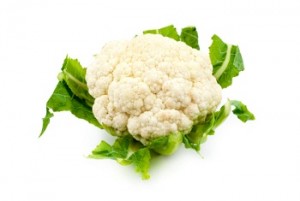
Roasted Cauliflower

Sometimes in a quest to experience a blend of flavors, we ignore the most simple and pure flavors. We sometimes forget that a recipe does not have to be complicated, or contain a lot of ingredients, to be tasty. Roasted cauliflower is one of those recipes for us. When roasted the cauliflower releases its natural sweetness. Many a dinner guest has been converted from a non lover of cauliflower to a follower after tasting this recipe.


1 medium head cauliflower (2 1/2 to 3 Ib), cut into 1 1/2 inch wide florets
2 tablespoons extra-virgin olive oil
1/4 teaspoon salt


Put oven rack in middle position and preheat oven to 450°F.


Toss cauliflower with oil and salt. Spread in 1 layer in a large shallow baking pan (1 inch deep) and roast, stirring and turning over occasionally, until tender and golden brown, 25 to 35 minutes.

Share this:
Share this page via Email Share this page via Stumble Upon Share this page via Digg this Share this page via Facebook Share this page via Twitter
Posted in Recipes | Tagged , , | Leave a comment

Too much citrus?

If you are like me, you sometimes have too many lemons, limes or oranges left over and you do not want them to go bad. Try slicing them into rounds and placing them on a plastic wrapped baking sheet and freezing overnight. The next day you can transfer them to sealable plastic bags and store in the freezer. These are then great in a pitcher of (fruit) water, cocktails, lemonade, tea, and etc. as they also chill while they flavor. Give it a try.

Share this:
Share this page via Email Share this page via Stumble Upon Share this page via Digg this Share this page via Facebook Share this page via Twitter
Posted in Kitchen Tips | Tagged , , | Leave a comment

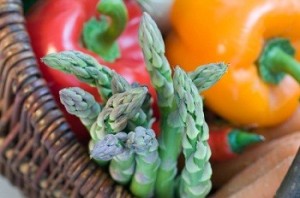
Asparagus and Peppers with Goat Cheese


Asparagus is a wonderful vegetable that is low in calories but high in vitamins and minerals. It is high in fiber and has natural diuretic properties, not to mention that it tastes great as well. I love them outside on the grill, but roasting them indoors can also be an excellent choice for a beautiful dish. The blend of flavors in this dish marry for a explosion of flavors.


2 tablespoons olive oil
1 tablespoon unsalted butter
2 pounds 1/2 inch thick asparagus spears
kosher salt
ground black pepper
1/2 of a lemon
2 medium red bell peppers, seeded and cut to 1/4 inch strips
2 tablespoons chopped fresh mint leaves
4 ounces goat cheese, crumbled


Heat the oil in a skillet over medium heat until shimmering. Add the peppers and cook, stirring occasionally, 4 to 5 minutes. Transfer peppers to bowl and cover. Clean the skillet with water and dry well.


Heat oil and butter in the skillet over medium heat. When butter has melted, add the asparagus to skillet making sure to use tongs to arrange so that as many as possible are in a single layer. Cover and cook until asparagus is bright green and still crisp. This step will take about 3-5 minutes, but be careful not to overcook if you are using a thinner spear. Extremely thin spears should not be used.


Uncover and increase heat to high and add salt and pepper. Cook until the spears are tender and well browned along one side, using tongs to occasionally adjust spears for even cooking, 5 to 7 minutes. Transfer asparagus to serving dish, adjust salt and pepper to taste, squeeze lemon over spears and top with the peppers. mint, and goat cheese. Serve immediately.

Share this:
Share this page via Email Share this page via Stumble Upon Share this page via Digg this Share this page via Facebook Share this page via Twitter
Posted in Recipes | Tagged , , , , | Leave a comment